How to Scan Receipts and Documents to PDF with iPhone
In the last few years, It dramatically changed how many ways we can use our phones for multiple different purposes. Phones have become smarter and more useful. Just a few years ...
In the last few years, It dramatically changed how many ways we can use our phones for multiple different purposes. Phones have become smarter and more useful. Just a few years back, it was essential for me to use a flatbed scanner for all types of scanning needs. This includes scanning photos or scanning a document, sometimes even receipts.
When Apple released iOS 14, there are some significant usability improvements came along with it. Such as one, scanning documents or receipts. This feature has been built into the Native Apple Notes app.
Now, let us take a look at how easily you can scan a set of documents with your phone and make them PDF for further use or to share in multiple places.
What will you need to do this?
- Your iPhone
- Your document pages you would like to scan
Step 1 – Prepare your Document Page
Put one of your document pages in a place where it is sufficiently lighted. It is preferred not to put them in a place where something cast some shadows. Generally, a tabletop with natural lighting would do it.
Step 2 – Prepare your phone
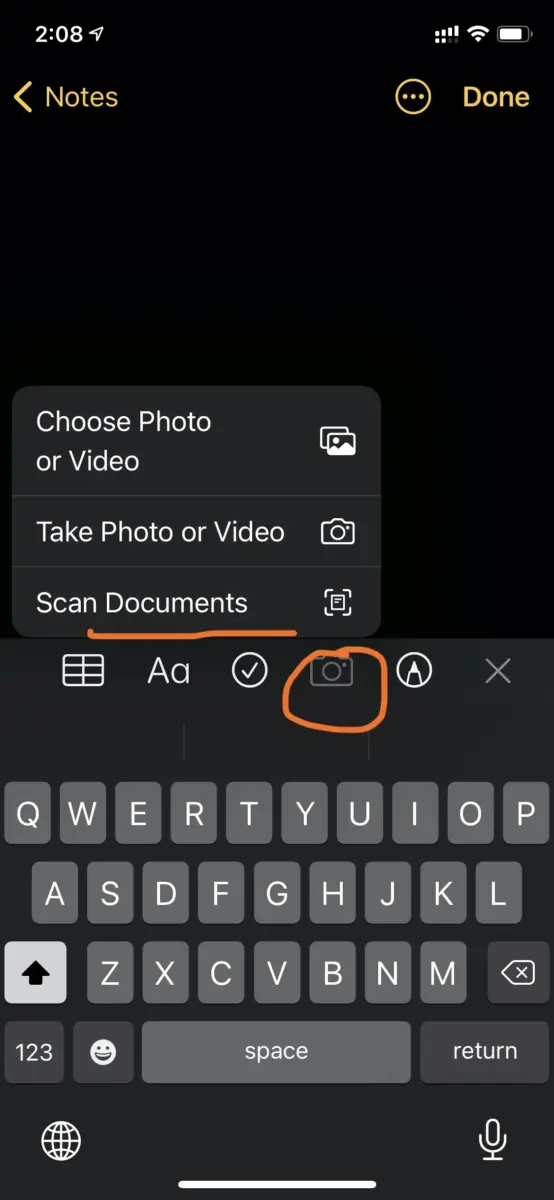
First, open up your Apple Notes app on your phone. Now, create a new Note.
When you enter the new note, you will see few icons on top of your virtual keyboard.
Tap and Hold the Camera Icon to display few camera options. One of the Option is “Scan Documents”
Step 3
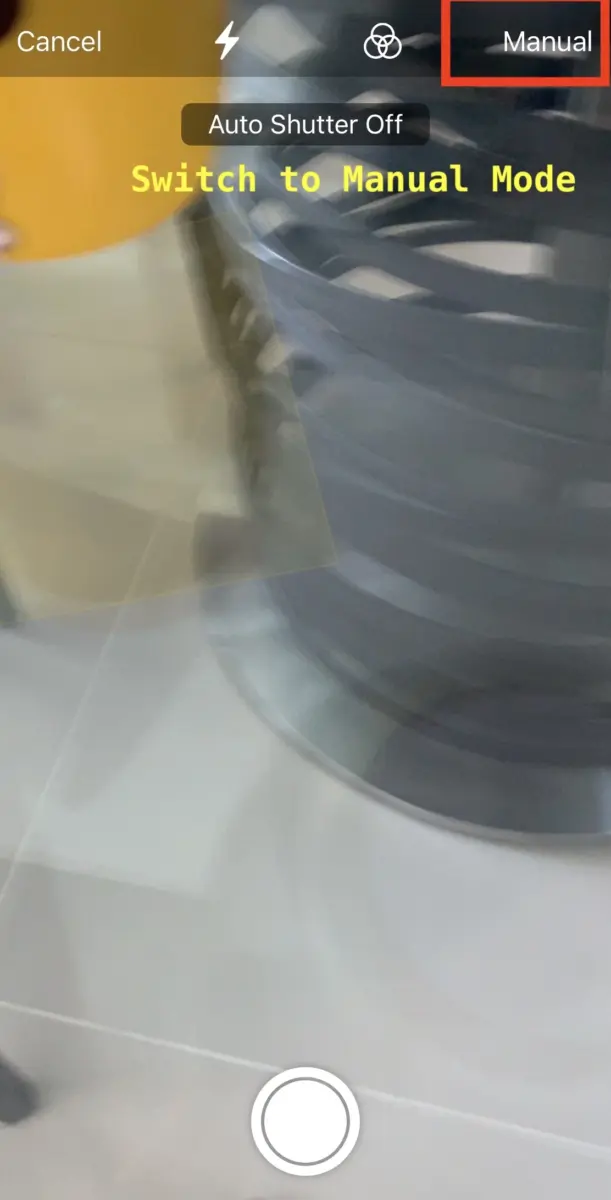
Open the Scan Documents camera option and it will open the Camera for this specific purpose. When you are in the camera mode, turn “AUTO” to “Manual“, located top right corner of the Camera view.
Step 4
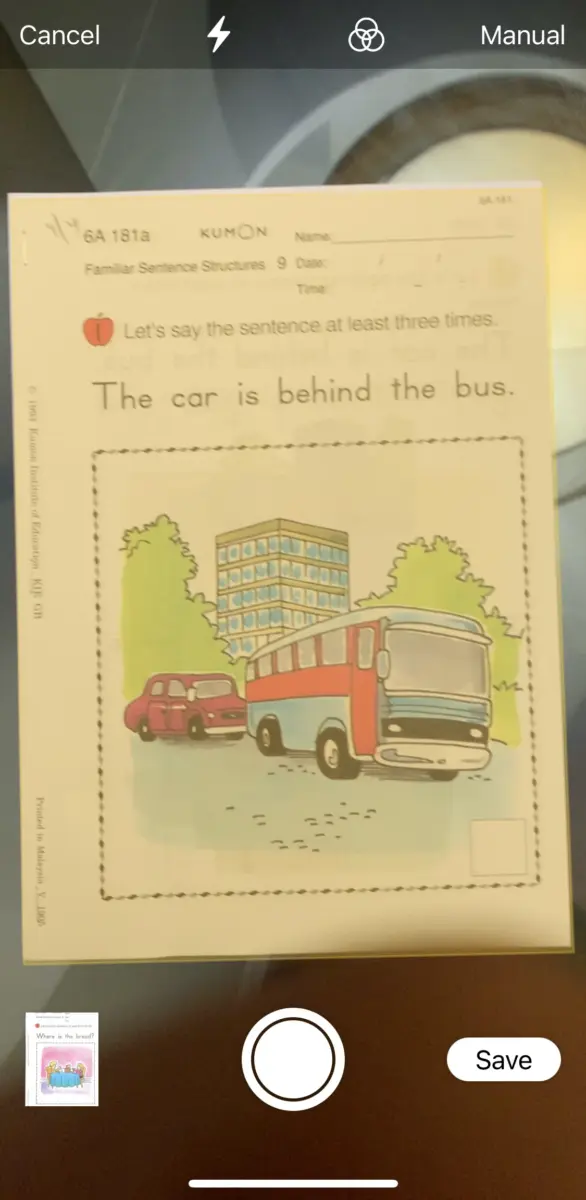
Now place your camera above the document you would like to scan, try to fit it in the camera frame. A yellow highlight will be visible when the document in scanning mode.
Step 5
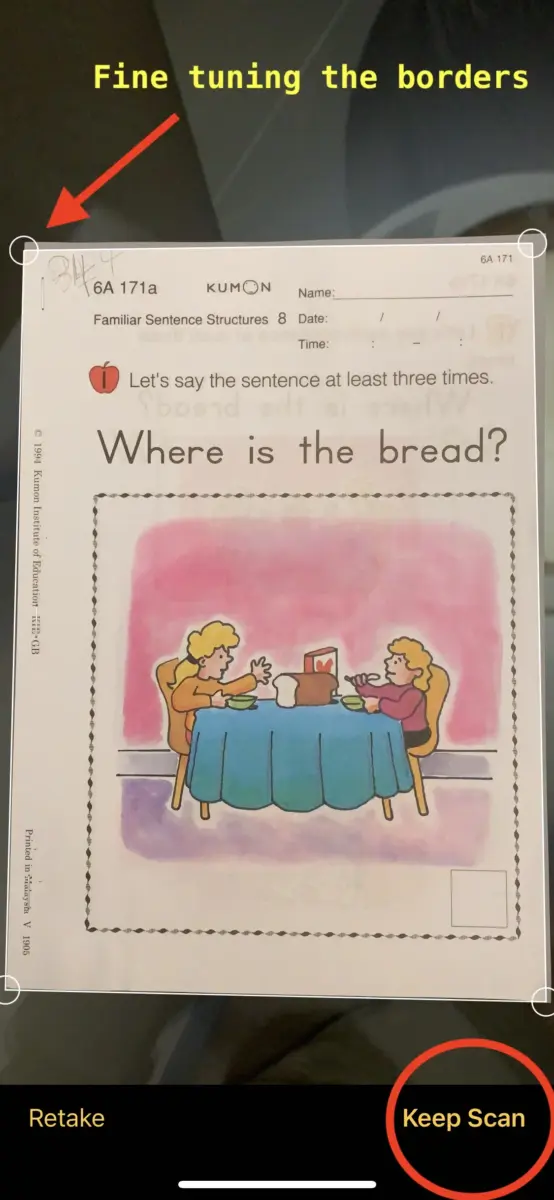
You can snap the photo and it should detect the borders of the document with an outline.
Your current snap will be added to the stack on the right bottom of your screen. You can continue snapping more photos and they will be added to the stack. In this way, the stack will be one PDF file.
You can also finish the process and Start scanning a new document to make new PDF stacks. Just repeat the process from Step 1 to 5.
The stacks of photos will be added to your new Note, and you can tap them to view, share in email or WhatsApp. You can also save it to your cloud storage like OneDrive or Apple Cloud.
The whole process is fairly simple and does not require and 3rd party apps to accomplish this job.
Have fun scanning with your iPhone (Or iPad).
TIPS:
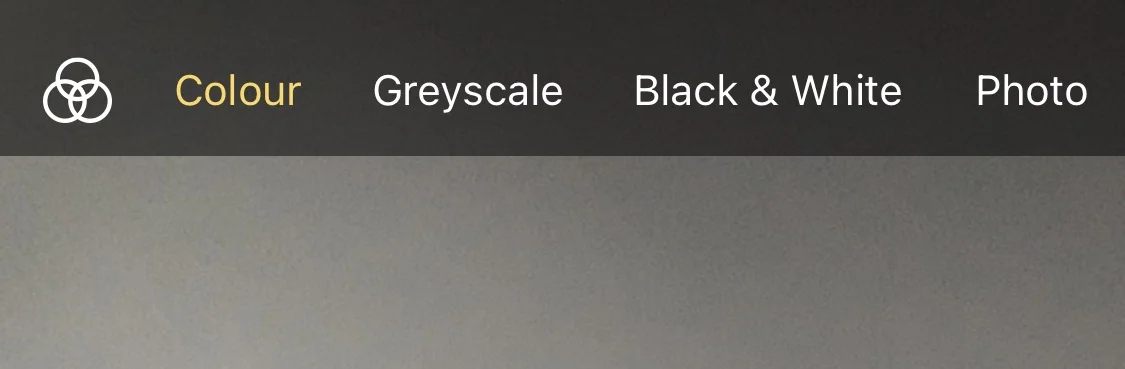
You can adjust the color profile of the camera if you prefer to take black and white photos or grayscale ones.
Comments
Loading comments...