Create a Static Blog with Publii and Host for Free at Netlify
If you are like me, you have tried and explored many static site generators such as Hugo, Jekyll & so on. But there is a bit of a learning curve when you start to use static sit...
If you are like me, you have tried and explored many static site generators such as Hugo, Jekyll & so on. But there is a bit of a learning curve when you start to use static site generators. The core objective for this article is to make one understand how to make a static blog with Publii and host it for free at Netlify.
The points mentioned below are the cautions of using static site generators:
- You need to be handy with command-line tools, Ruby and few other console utilities
- There aren’t plenty of visual editors for them, it takes much more time to compose a post or page or configuring the website
- Requires a handful of knowledge about GIT and GIT-based processing tools
- You will need to process all the files on your desktop or laptop, though some online platforms can help you generate the files too (Namely Netlify)
If you ask me, I don’t think an average person can handle all the advanced tools had to publish a static blog site perfectly.
But, why static blog site? Why not WordPress?
With static HTML, it is much simpler. You write the code (together with content). Then, once it’s on the server, it stays as it is. There’s no background processing going on – the HTML files are there in their finished form.
On the other hand, WordPress is a content management system that uses PHP and a database. That means that when someone visits your WordPress site, your server “generates” your site by:
- Executing the PHP code to render the HTML version of your site
- Querying your database to get the content to plot into that HTML
WordPress sites require PHP and database (MySQL or similar) processing engines, which means it requires a server that you need to pay for. It also requires more RAM and CPU power to make calls to the database and process PHP scripts.
Here are some of the benefits of a static (blog) site:
- It is extremely fast because the generated pages are HTML files, you can even get score up to 99/100 in google page speed score
- It is more secure because there are no dynamic calls to PHP or MySQL
- It can run in a very low overhead server because it does not require CPU-based processing to process PHP or MySQL Database calls
So I went to search for a solution that can enable me to use the static site or static blog without going through all the complications or the trouble of editing the posts.
Then I found Publii – it is a desktop-based application (macOS, Windows, Linux) that enables you to generate a static site or static blog without going through the trouble of all the static site generators.
What is Publii?
Publii is an app that brings a new concept to the web-development table; the first desktop static-website CMS. Designed with the simplicity for beginners to use but boasting extensive options and functionalities that allow experienced web developers to make more complex modifications, Publii creates a safe, fast static website without all the hassle.
Before starting using Publii it is important to understand that while it is technically a CMS (Content Management System), it does not work in the same way as other CMSs you may have seen such as WordPress or Joomla!. Usually, the defining characteristic of a CMS is that it is software that runs on a server; first, you must buy hosting that provides you with access to a server, then upload the CMS files to the server and install it directly there.
What this means is that everything related to your website is run on the server; if you want to create a new post, edit a category, or add images to your site, you must first login to the CMS on the server and make your changes there. You must be constantly connected to the internet for this so that any changes can be sent to the software as you make them. Though it’s possible to create the website offline and then transfer it to your server, it’s not an easy process and is prone to issues. — Cited from their documentation
The Advantages of Publii:
- It uses desktop-based CMS software, CMS does not need PHP or MySQL on the server-side
- Can work on low-resource servers because the generated site is pure HTML format
- Ability to configure and tweak settings of the website from the desktop application
- Ability to inject codes in the header and footer or add custom files (like .htaccess) to the file system
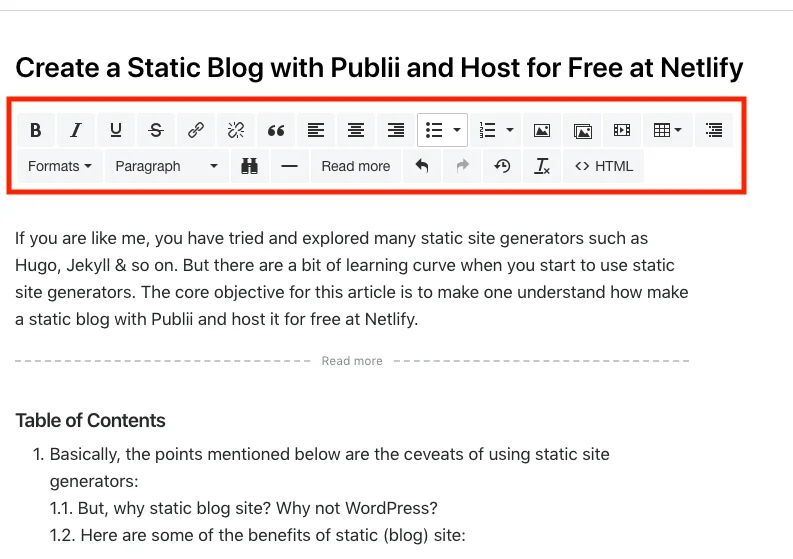
- Visual editor for posts and pages
- Support for AMP site generation
- Support for Image uploading and compress them automatically
- Connect to multiple types of hosting targets such as Netlify, Amazon s3, SFTP or just local folder structure
- On the fly change themes and see preview locally
- Lazy Loading Images
- Gallery support
- Twitter, Facebook, and OpenGraph tags support
- Comments system provided via Disqus comments
- Ability to use Featured images
- Ability to Generate Table of Contents for posts
- SEO Tweaks per post or sitewide
- Post Properties Tweaks
- Navigation menu editor
- Highly secured due to the nature of the static website
- You do not need to update the CMS library at the server, just upgrade the desktop software
Disadvantages:
- You will need your desktop application to make changes on your website
- Some advanced configuration might not be possible
- Does not have a built-in comments system
- Making a static page requires a bit of work (eg. Hide it & exclude it from the – in this way you can make static pages)
- No grammar or spelling tools available
- Not many themes available
Get free hosting with Netlify
If you are not aware of Netlify; you can Deploy modern static websites with Netlify. Get CDN, Continuous deployment, 1-click HTTPS, and all the services you need. And there is a free tier plan available.
First, an account at netlify. Once you are done with the signup process, you can log in to the site and create a static site just by download and dragging this file in your netlify dashboard.

This action will create an empty site with an empty HTML file. Which will look something like below:
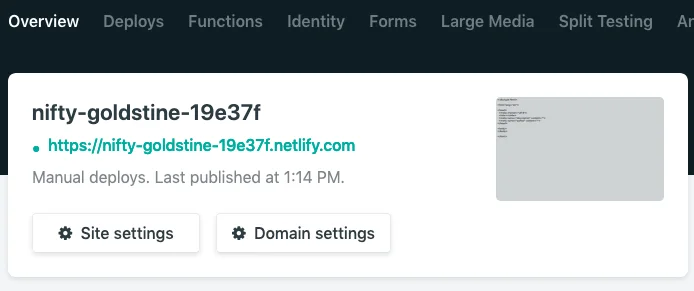
Copy the Netlify URL( somename.netilify.com) as a reference, which we will need later for configuring Publii.
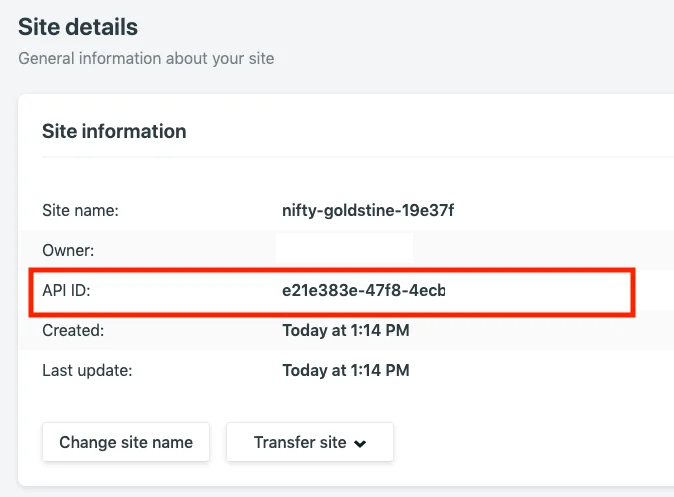
Now, Go to “Site Settings” and Copy the API ID of the site, we will use this later to connect Publii to netlify.
Once this process is done, go to netlify user settings page to create a token. You can access this via the right side top corner icon.
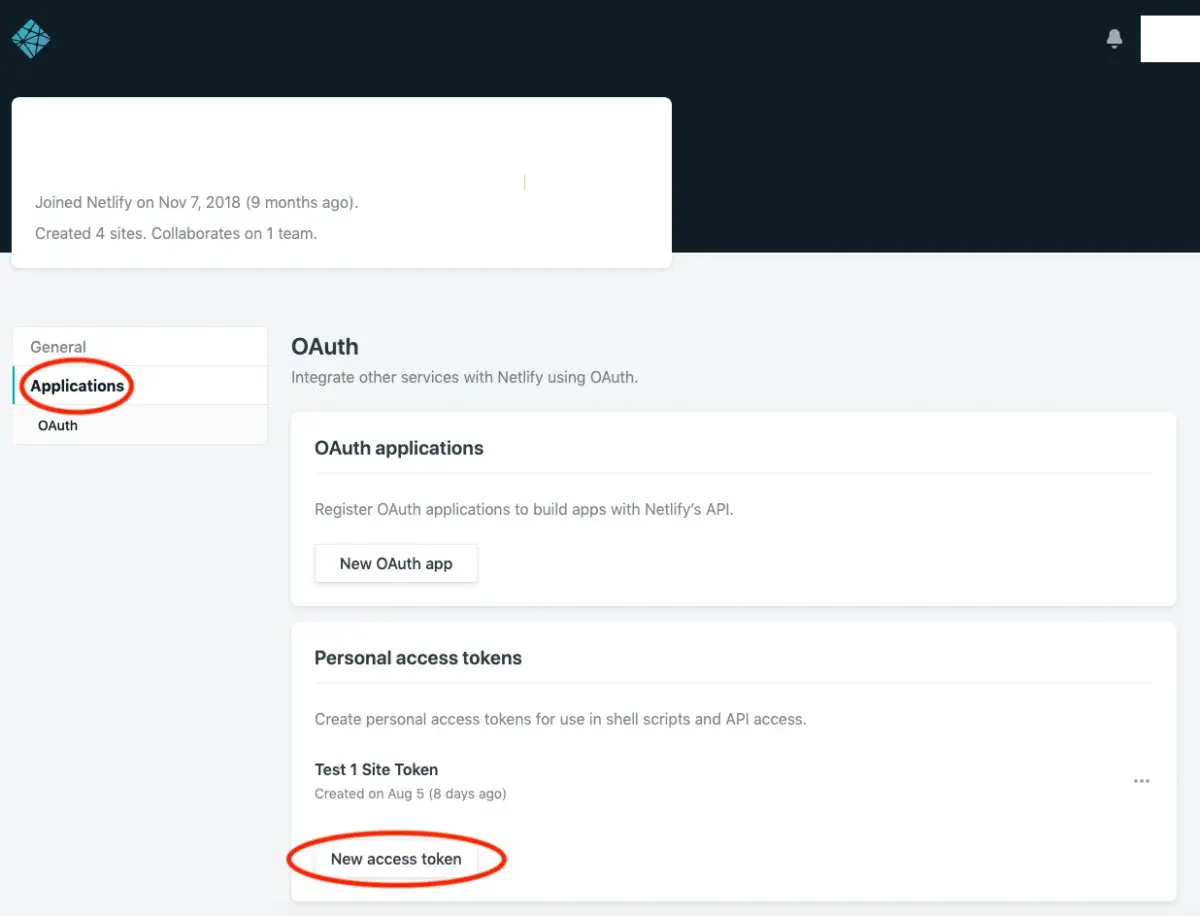
Create the token, you can give it a name like “Publii“, we will use this information later to configure server details at the Publii desktop application.
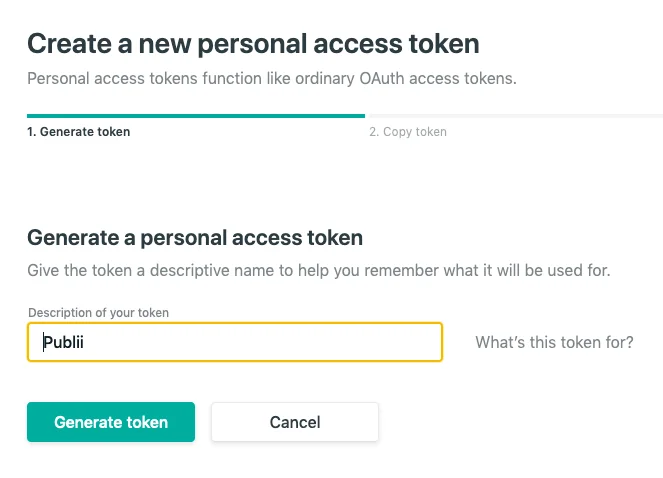
Copy the generated token and keep it safe.
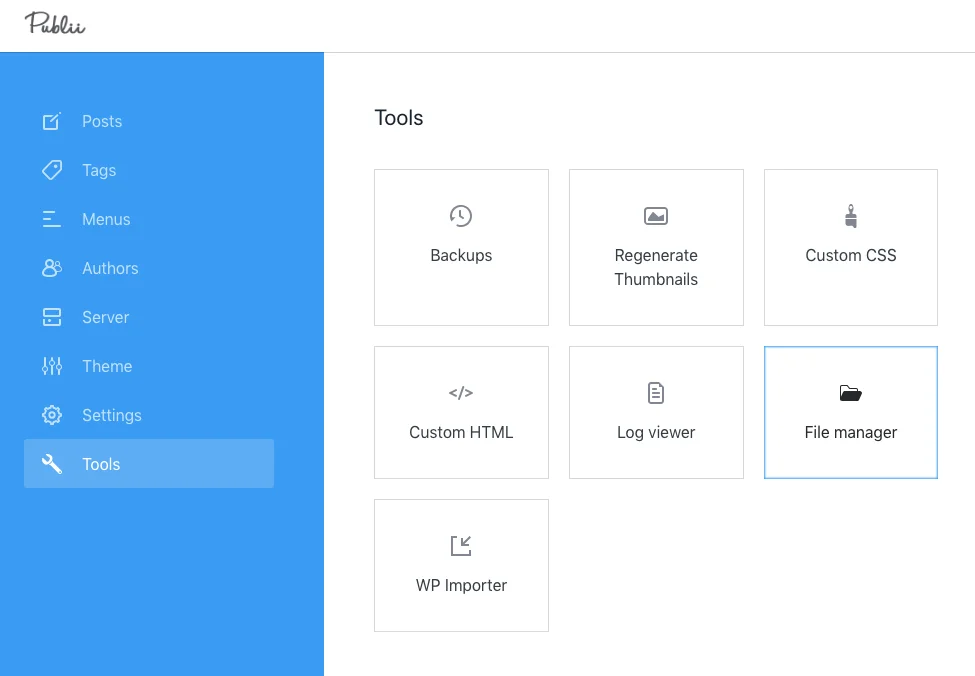
Install Publii
Now you should download and install the Publii desktop application. Once it is installed, you can go ahead and create a new website from the application.
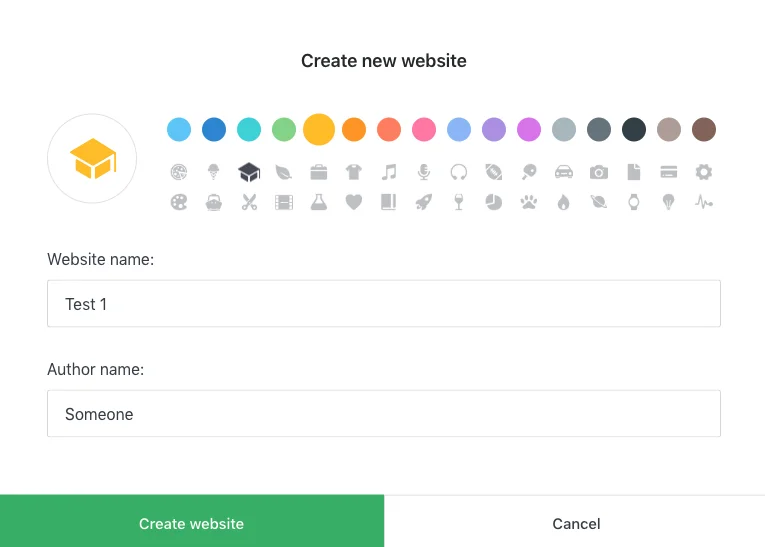
Once a website is created, you can access the server settings from the left-side menu.
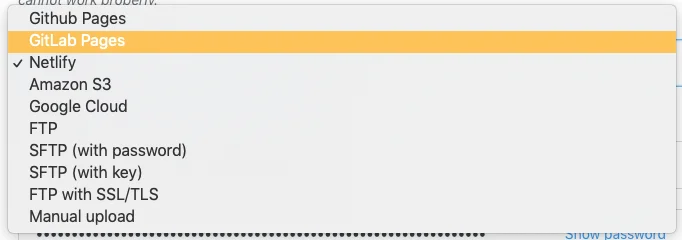
Connect to Netlify
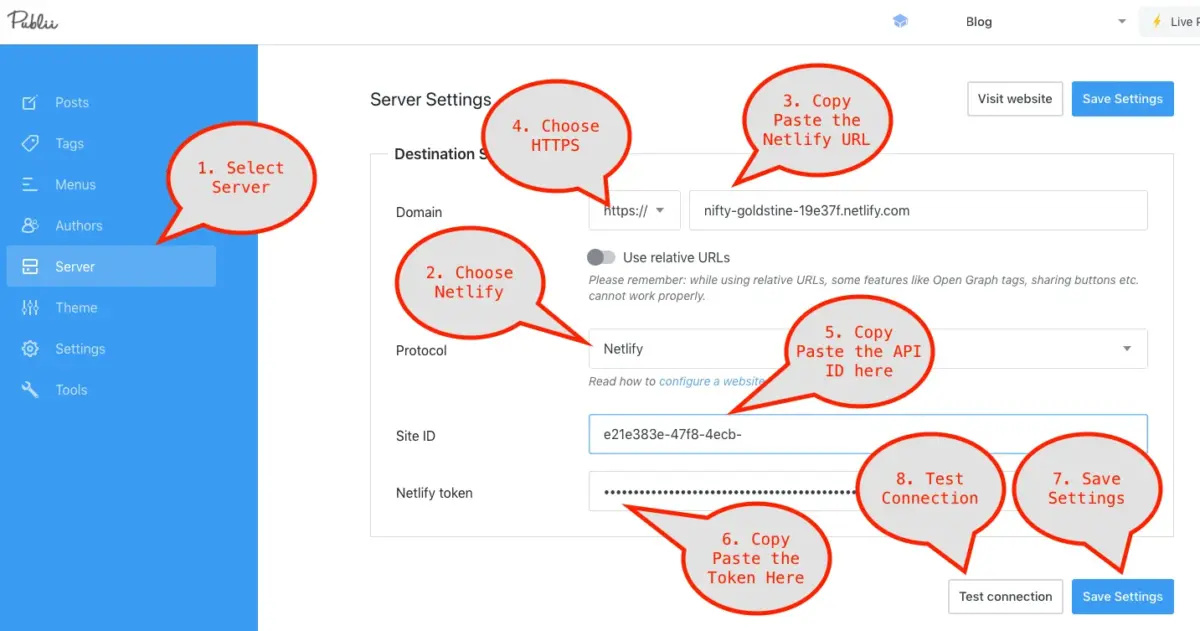
- From the left menu panel, Select Server
- Now Choose “Netlify” as the protocol
- Copy and paste the netlify generated URL (Select HTTPS)
- For Site ID: Paste the API ID of the site (Shown earlier)
- For Netlify Token: Paste the generated Token
- Then Click Test Connection to test the integration
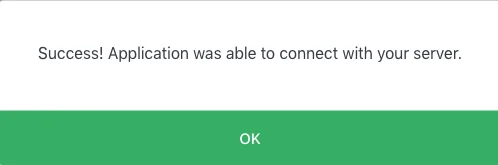 Example of successful connection.
Configure Site and Theme properties at Publii
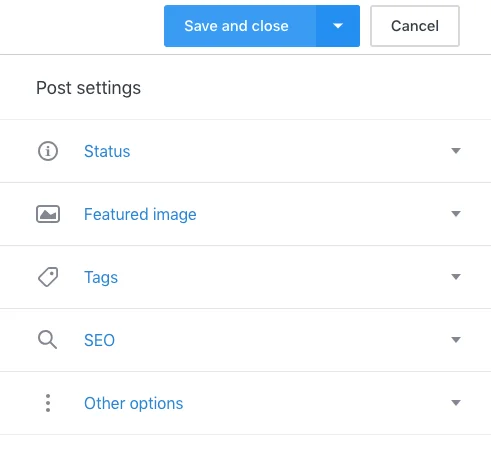
You can configure various site related and theme properties from the Publii application.
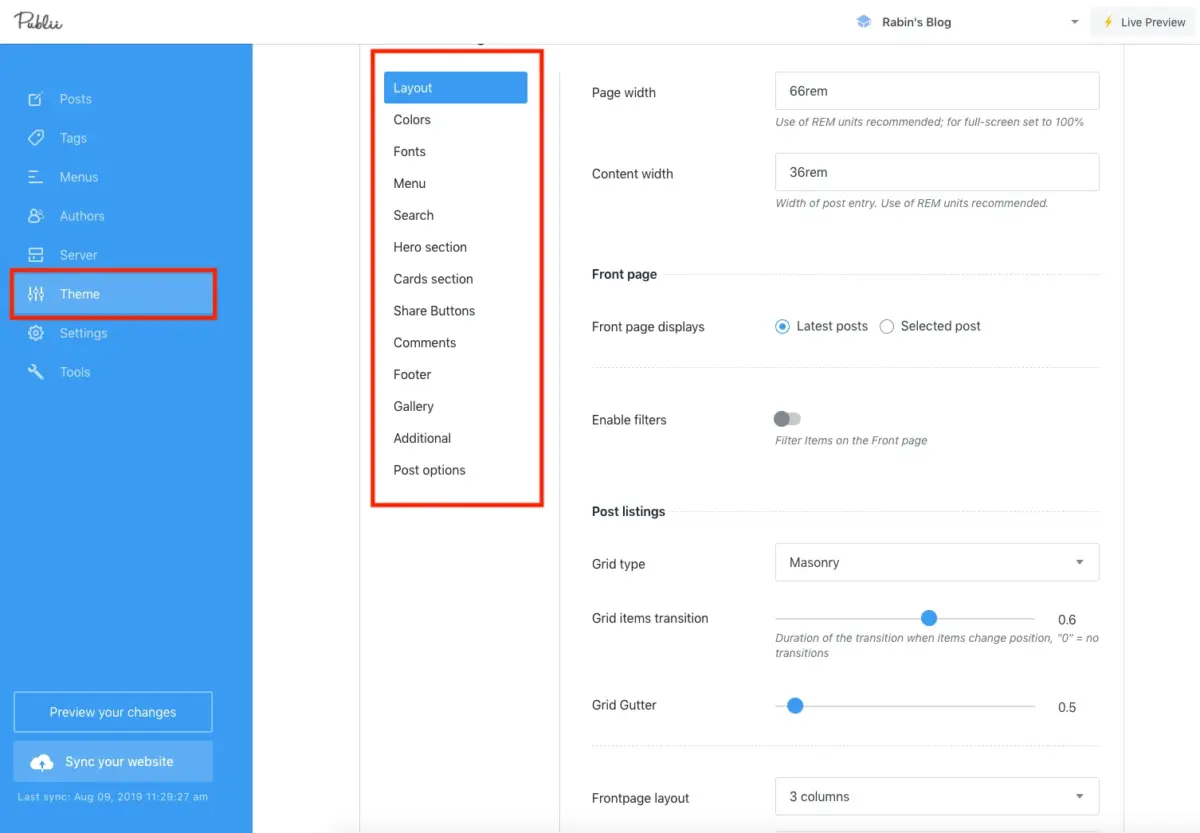
You can access theme related settings above.
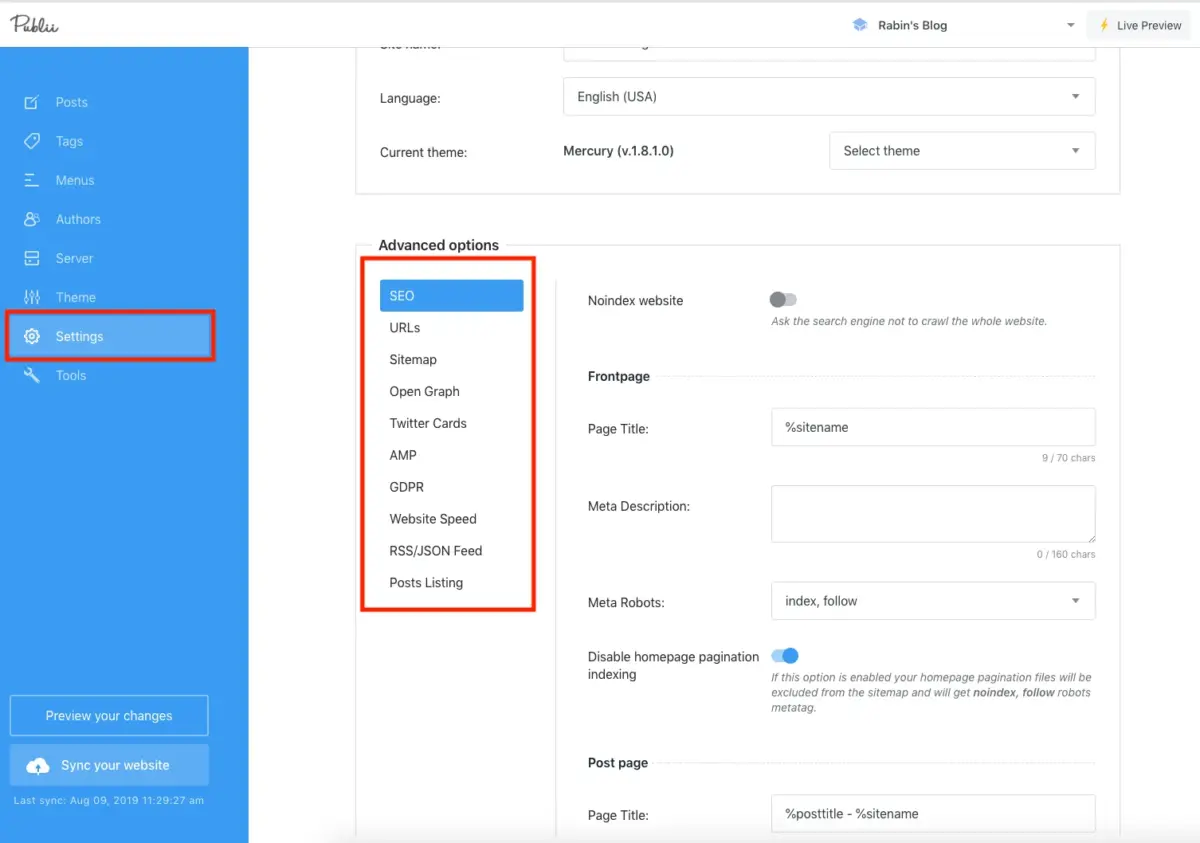
The other website settings and tweaks
See a Preview of your site locally
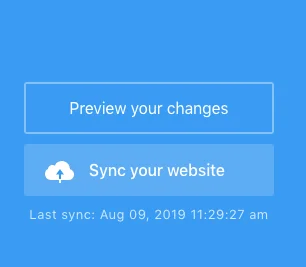
When you click “Preview your changes“, it will generate the site locally and open in your default browser.
Sync your site with Netlify

When you are ready, you can use the “Sync your website” button to sync the changes in netlify. It may take a minute or so.
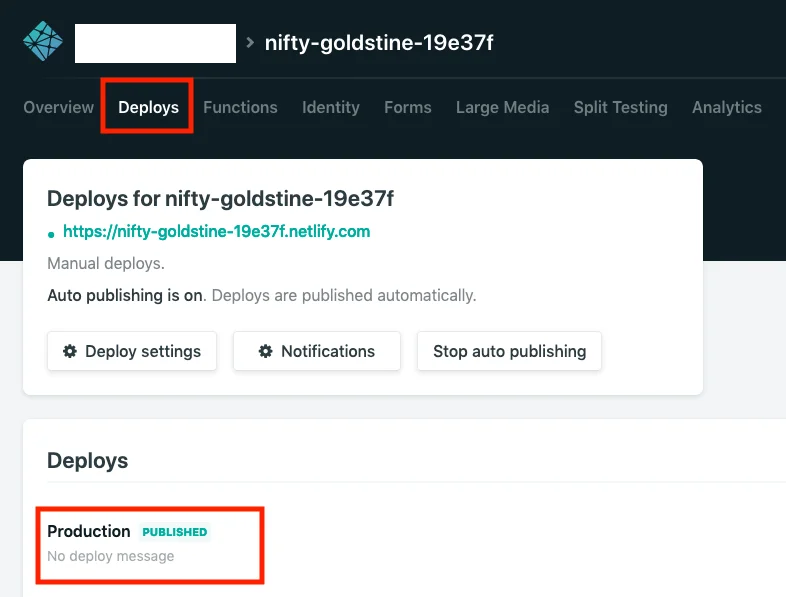
See your site online
Once the “Sync your website” process is finished, you can head over to your netlify admin and enter the site profile you have created. Click on the “Deploy” menu item to see the deploy messages. Once it says “Published” in the badge, your site is online. You can use the Netlify URL to access your website.
Optional: Add a custom domain
You can add a custom domain to your netlify account, which can be used as the main domain for your website. You can find the instructions here.
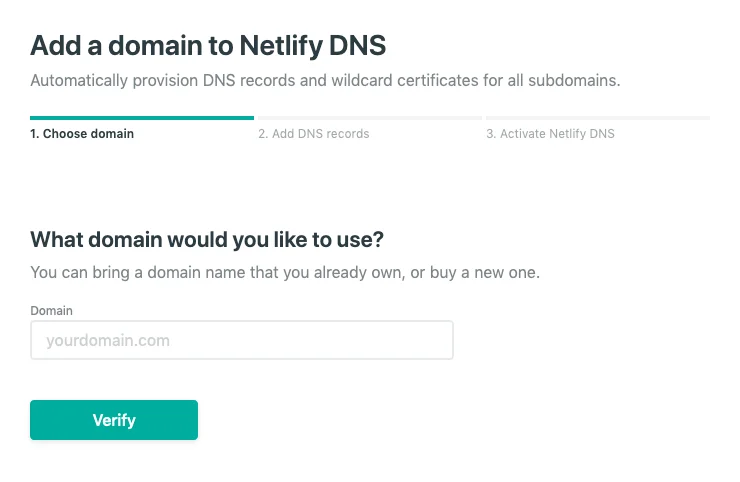
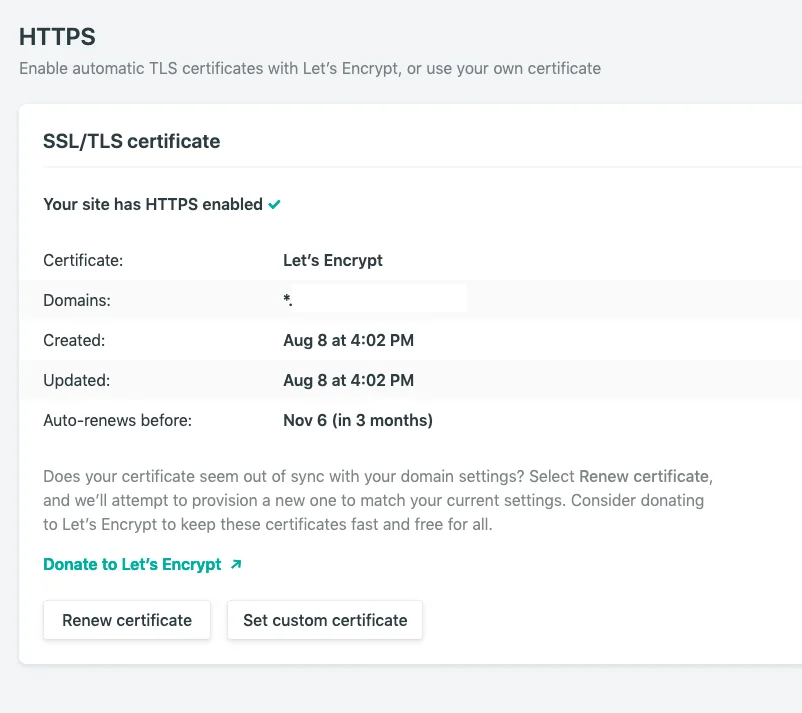
Please note, once you use netlify DNS for your domain name, it might take 8-24 hours to propagate the changes. Once the domain is ready, netlify will provide a LetsEncrypt certificate for your domain automatically.
Optional – Optimize Content using Netlify
You can also configure netlify to optimize your resources on their CDN side. To accomplish this, simply head over to your site settings, Then select “Build & Deploy” and go to the “Asset Optimization” part. You can select the options as you see below.

By default, Disable Asset Optimization is selected, you can uncheck that and select the options you like to have. Then “Save” the settings.
Optional: Add a Contact Form using TypeForm
You can create great-looking contact forms using TypeForm.
Conclusion
I hope you have some insights of creating your Static Blog site by using this article. Yes, there is some preliminary process involved, but once you can get this ready, you will be able to blog – for free. While being free, you also get an excellent performance out of your website. You can create a blog in this process which costs:
- Hosting (Netlify, GitHub Pages, GitLab Pages etc.): $0.0
- CMS Tool Publii: $0.0
- Domain name: $10/year
Comments
Loading comments...